Thursday, May 20, 2010

Copper Lab


Introduction

We are conducting this lab to see how aluminum and copper sulfate transform into Copper metal. The more surface area on a metal the faster it will react. Instead of using aluminum foil we used aluminum powder which has more surface area so it produced the product (copper) more rapidly. In the activity series Aluminum is above copper so aluminum replaces copper.

Materials

  • Glass Beaker
  • Stirring Rod
  • Paper towel
  • Bunsen Burner
  • Copper Sulfate
  • Aluminum
  • Ring Stand
  • Asbestos pad
  • Propane
  • Striker
  • Weight Paper
  • Scale
  • Aprons
  • Goggle
Procedure
we set the ring stand up and and measured out the right amount of water. hooked the Bunsen burner to the propane and lit it. As the water was getting to a steady boil we measured out our copper sulfate. Once we had that in the water we stirred it until it was gone and the water was blue and once the water was at a steady boil we and all the copper sulfate was gone we measured out the aluminum powder and added that to the water and copper sulfate. Stirred that in and kept the water at a steady boil we just kept stirring until the copper metal started to form and once all the copper was formed and the water was pretty much clear we filtered the copper out of the water and let it sit over night. The next day we took the copper we got and weighted it to see how much copper metal we got and found our theoretical, Actual and the percent yield.

The safety concerns we encountered in this lab were that we were handling chemicals so it was mandatory to be wearing goggles and an apron at all times.

Products

Mass

Copper II Sulfate pentahydrate

9.21

Aluminum

.97

Coffee Filter

.87/1.80

Dry residue product

3.10

Water

95 mL

Conclusion

At the end of our experiment the Copper Sulfate and Aluminum reacted with each other and created Copper Metal. The Theoretical Yield was 3.43 and the Actual yield was 3.10 which gave us a % Yield of 90%. It is a single displacement reaction. There was a lot of chemical changes during the experiment including color change, precipitate, and surface area.

Thursday, March 18, 2010

REACTION TYPES


1. INTRODUCTION

Synthesis-When 2 things combine to form a single compound

---oxygen gas+hydrogen gas----->water

Decomposition-A compound breaks down into 2 or more simpler compounds

---sulfurous acid----->water+sulfur oxide

Single-displacement-One elements takes the place of another (a metal replaces a metal)

---zinc metal+copper(II)nitrate----->zinc nitrate+copper(II)

Double-displacement-The positive and negative portion of 2 ionic compounds interchange

(metals switch places)

---magnesium chloride+silver nitrate----->magnesium nitrate+silver chloride

Combustion-When a substance randomly combines with an oxygen to form many oxides

---methane+oxygen----->carbon dioxide+water


2. PROCEDURE

1. Obtain 3 small test tubes

2. In the first test tube, place a piece of zinc and about 1/2 mL of CuSO4 solution. Record observations.

3. In the second test tube add about 1/2 mL Ba(NO3)2 solution to about 1/2 mL of CuSO4 solution. Record observations.

4. In the third test tube place a piece of magnesium ribbon. Add about 1/2 mL of HCl solution. Record observations.

5. Light a bunsen burner (burning propane gas, C3H8). Record observations of the flame.

6. Rinse out the first test tube. Add about 2 mL H2O2 solution. Lightly heat it. Record observations.

7. Add a pinch of MnO2 (catalyst) to the H2O2 solution. Lightly heat it. Record observations.


3. DATA TABLE
(Above the pictures)
4. DATA ANALYSIS
Balanced equations:
1. Zn+CuSO4--->ZnSO4+Cu single-displacement
2. Ba(NO3)2+CuSO4--->BaSO4+Cu(NO3)2 double-displacement
3. Mg+HCl--->H2+MgCl2 single-displacement
4. C3H8+5O2--->4H2O+3CO2 combustion
5. MnO2+H2O2--->H2O+O2 decomposition

5. DISCUSSION AND CONCLUSION

1. This reaction was a single displacement reaction because the two metals (zinc and copper) switched places.

2. This reaction was a double displacement reaction because both of the metals switch places.

3. This reaction was a single displacement reaction because hydrogen and magnesium switched places.

4. This reaction is a combustion reaction because the products are CO2 and H2O and many oxygens produced.

5. This reaction is a decomposition reaction because manganese decomposes leaving water and a nonmetal oxide.

This lab was very helpful in understanding the different reaction types. We got to observe how various chemicals react with one another. We learned how single displacement, double displacement, combustion, and decomposition occur. It helped us learn how to tell on our own what kind of reaction we were looking at, without looking at the actual chemical equation. By doing this lab, we got extra practice balancing equations while getting to do a hands on experiment.

Friday, February 19, 2010

Polarity and Molecular Shape Lab


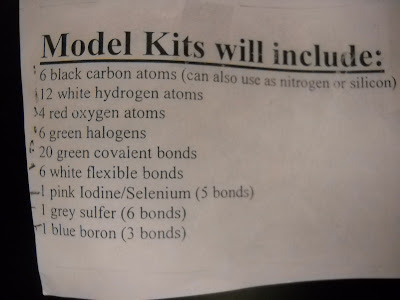
We are trying to familiarize ourselves with Lewis structures. To do this, we are building models with plastic tubes and balls.

Our hypothesis is that we will become better at building models using the given materials. Also, we will be able to draw Lewis structures better.

Materials
1. Small balls—(hydrogen, fluorine, etc.)
2. Long tubes—connectors
3. Paper towels
4. Camera
5. Pencil #2


There are not really any safety concerns in this lab. We are working with safe, fun, and easy modeling kits.

Procedure
1. Build a model for each of the molecules listed on the table on the Lab page.
2. Draw a 3-D structure of each molecule and record it into a table. Use solid lines to represent bonds in the plane of the paper, dashed lines for bongs that point back from the plane of the paper, and wedged lines for bonds that point out from the plane of the paper toward the viewer.
3. Determine the shape of the molecule.
4. Find the bond angle for each molecule.
5. Determine whether each molecule is polar or if it has a resonance structure.
6. Take pictures of the models you made along with a paper towel that says which Lewis structure it is.

Results
We found out that by building molecules, we get more acquainted with the bonds and repelling groups. The photography and lewis structures (above) are just a few of the many models that we put together. By comparing these lewis structures to the actual models, we are able to make more connections between the repelling groups (dots in Lewis structures) and bonds (lines in the Lewis structures).


Conclusion
We accept our hypothesis because we did indeed learn how to construct models and draw Lewis structures better.


We learned that to become better at understanding hard concepts, you need to look at the situation from different angles. Not only did we draw Lewis structures constantly, we also built models. This could be applied to any real life situation.

The only errors we could have made were drawing the Lewis structures wrong or constructing the models incorrectly.

Thursday, February 4, 2010

Paper Chromatography Lab


We are trying to find out which solvent works best to separate the pigments of overhead pens. The questions we are trying to answer are:
- What solution separates the inks best?
-Which colors are pure substances and which are mixtures?
- Which solutions are nonpolar and which are polar?
We know that chromatography is used to separate compounds of a mixture by placing the mixture in a mobile phase that is paused over a stationary phase. The solvent containing the ink travels up the paper by capillary action. The dissolved dyes from the ink travel at different rates according to the attraction they have for the solutions.


Our hypothesis is that water will work the best because we don’t know what the other solutions are. We know that water is polar.


Materials include: Chromatography paper
Overhead pens (black, red, orange, green, blue, purple)
Solutions—H20, CH3OH, C3H7OH, C6H14
24 well-plate
Paper towels
Pencil
Camera
Warm-up Notebooks
Safety Goggles
Aprons
A few of the solutions are very dangerous, so it is VERY important to wear goggles and aprons. We kept our lab station under the fume hood so that is would suck up any dangerous fumes. Also, we DID NOT put our heads under the fume gate, because this could result in the inhalation of toxic fumes. We were suppose to dispose of our solutions into the sink and wash out our well plate thoroughly.


Procedure:
In this lab we used chromatography strips of paper to sort out the different pigments in pens. In the first part, there were four solutions that we used to sort out the different pigments of a black overhead pen. In the second part, we used one solution (water) and sorted five different pens into different pigments.

Part 1
Cut 4 strips of chromatography paper into approx. 1.5 cm by 8 cm strips.
Make a high angled bend at one end of the paper (1.5 cm from the end). Put a pencil line near the crease and dot the ink on the pencil line. Be careful not to let the dots bleed into one another.
Use a pencil to label each strip to which solvent will be used.
Fill 4 separate wells on a 24 well plate approximately ½ full of the following solvents: H20 (water), CH3OH (methane), C3H7OH (isoprobyl alcohol), C6H14 (hexon)
Place paper strips into each well so that the short end is in the solvent. (Make sure not to dip your dots)
Allow the solvents wick up the paper for approximately ½ hour.
Answer the questions about part 1.

Part 2
Choose a single solvent from part 1 to test it’s ability to separate different colors
Repeat steps 1-4 in the procedure from part 1 with different colored inks
Label the strips with pencil to which color of dots they have.
Fill 4-5 wells (depending on how many colors you have) ½ full of the solvent that you chose
Place your paper strips into the wells so that your short end is in the solvent.
Allow the solvent to wick up the paper for approximately ½ hour.
Answer the questions about part 2.


Results
All of our scanned pages, digital photos, etc… are located above the lab report.


Conclusion
We accept out hypothesis, because water was the most polar and separated the pens the best. From Part 1 we can see that water made the pigments from the black pen travel the farthest up the chromatography paper. So obviously, it worked the best.

This is the order (from most effective to least) in which the solutions separated the inks
Water
Methanol
Isoprobyl alcohol
hexane


We learned that water is extremely polar and can be used to separate mixtures out.

Possible errors are not letting the papers soak enough and dipping the dots into the solutions on accident.